Welcome to the world of makeup mastery! Whether you’re starting out or you’re a big fan, we’re here to help. We’ve gathered expert tips for making your natural beauty shine. From picking the right foundation to applying eyeshadow, we’ll share secrets for a perfect, lasting look.
Putting on makeup can be tricky for many, especially if you don’t know where to begin. In this article, we’re here to guide you at every stage. We’ll give you the knowledge and techniques you need. This way, you can tackle common problems and create a confident, beautiful image.
Key Takeaways:
- Learn expert tips to achieve a flawless and long-lasting makeup look.
- Understand different skin types and customize your makeup routine accordingly.
- Prep your skin with a proper skincare routine for a smooth and even base.
- Choose the right foundation shade and understand coverage options for a natural finish.
- Tackle common makeup challenges with expert solutions and beauty hacks.
Understanding Your Skin Type
Knowing your skin type is crucial for great makeup. Different types need different care for your makeup to stay looking good. Customizing your routine can make your makeup last longer and work better.
Identifying Your Skin Type
There are four main skin types:
- Oily Skin: This type shines easily and makeup tends to slide off.
- Dry Skin: It feels tight and makeup can look flaky.
- Combination Skin: Some areas shine, some are dry.
- Normal Skin: It’s balanced and suits most makeup well.
Knowing your type helps you pick the right makeup. You can tackle any challenges and get a perfect finish.
Makeup Application Tips for Different Skin Types
“Knowing your skin type is essential for flawless makeup. Adjust your routine to your needs for a perfect, lasting look.”
Experts give different tips for each type:
- Oily Skin: Use a primer to reduce shine and foundation that’s oil-free. A light dusting of powder sets your look.
- Dry Skin: Hydration is key. A moisture-rich primer and foundation with a dewy finish are best. Avoid powders that highlight dry patches.
- Combination Skin: Use different products on oily and dry areas. A little powder on the T-zone helps.
- Normal Skin: You can try lots of products and finishes. Choose a foundation that suits your style.
Adapting your makeup to your skin type gives you a flawless look. It boosts your natural beauty and lasts all day.
Makeup Tips for Different Skin Types
| Skin Type | Recommended Products | Application Techniques |
|---|---|---|
| Oily Skin | Mattifying primer, oil-free foundation, translucent powder | Use sparingly, focus on oil-prone areas, set with powder |
| Dry Skin | Hydrating primer, dewy finish foundation | Apply in thin layers, avoid powder, focus on moisturizing |
| Combination Skin | Mattifying products for oily areas, hydrating products for dry areas | Product placement, set T-zone with powder |
| Normal Skin | Versatile product options | Experiment with various formulas and finishes |
Adapting your makeup to your skin type ensures a flawless, long-lasting look. The right products and techniques can overcome skin challenges. This leaves you with a look that enhances your beauty.
Prepping Your Canvas: Skincare Routine
A great makeup look starts with good skincare. You should follow a skincare routine that hydrates your skin, lessens flaws, and makes a smooth base for makeup. You can perfect your look by including these essential steps in your skincare:
Cleansing
Your day should start with a face wash that matches your skin type. This will get rid of dirt, oil, and old makeup, building a fresh start. Clean your face using small circles with the cleanser, then rinse with lukewarm water. After, use a soft towel to gently dry your face.
Exfoliating
Take dead skin off and open your pores by exfoliating. This allows your skin to better absorb other products and breathe well. Pick a mild exfoliator suited to your skin and do this step once or twice each week. Massage the exfoliator gently over damp skin, then rinse with warm water.
Toning
Next, balance your skin with a toner. This step corrects your skin’s pH and makes sure all impurities are gone. Dab the toner onto a cotton pad and sweep it over your face and neck. Choose a toner that does what your skin needs, like hydrating or calming.
Moisturizing
Don’t skip the moisturizer. It keeps your skin glowing and soft. Choose one that fits your skin type and rub it in gently in upward motions. This locks in moisture and stops your skin from getting dry. Also, moisturize your neck and chest.
Additional Steps:
- Eye Cream: Use an eye cream made for the sensitive eye area. Apply it with your ring finger to be gentle.
- Serums and Treatments: For specific problems like acne or dark spots, use special products as directed.
- Sunscreen: Shield your skin from the sun with SPF 30 or more. Reapply every two hours outside.
Always follow your skincare routine. A daily plan that fits your skin makes your makeup last longer and look better.
Choosing the Right Foundation
Foundation is like a must-have canvas for makeup. It covers, smooths out your skin, and makes it ready for the rest of your routine. But picking the best foundation out of so many choices can be tricky.
Shade Matching: The key is to find the perfect shade to look natural. First, figure out if your skin is cool, warm, or neutral. Cool skin has pink or blue undertones, warm is yellow or golden, and neutral is a mix. Test a few shades on your jawline or wrist to find your match.
Coverage Options: Foundations range from light to full coverage. Light foundations let your natural skin show, while full ones hide blemishes for a polished look. Think about what you prefer and what the occasion calls for when choosing how much coverage you want.
Choosing the Right Formula
Don’t forget about the formula that suits your skin type. Here are popular choices:
Liquid Foundation: Good for most skin types, liquid foundation is buildable and looks natural. It comes in matte, satin, or luminous finishes to meet different needs.
Cream Foundation: Creams give lots of coverage and are perfect for dry skin. They keep skin hydrated and glowing. This is a great choice for the colder months.
Powder Foundation: Oily or combo skin does well with powder foundations. They offer a matte look and help control shine. However, they’re not the best for dry skin.
Think about your skin condition, the look you want, and special skin concerns when picking a foundation.
To make your foundation look its best, apply it well. A beauty blender or brush helps blend it in smoothly. Always blend outward and focus on areas that need more help. Finish with a bit of translucent powder for a lasting look.
With the correct shade, coverage, and type of foundation, your base will be perfect. This helps your makeup look naturally radiant all day long.
Tackling Common Makeup Challenges
Makeup is not just painting your face. It’s a way to show off your style and personality. But many of us find makeup challenges along the way. These troubles, like creasing or smudging, can really get you down.
There’s good news, though! Lots of expert tips and beauty hacks can help. They’ll make sure your makeup stays perfect all day long.
1. Creasing Eyeshadow
Eyeshadow creasing is a big problem. It can mess up your whole eye look. To stop this, use a quality eyeshadow primer first. It goes on your lids before your eyeshadow.
Avoid using too much eyeshadow. It can gather in your eyelid creases and lead to more creasing. Always blend your eyeshadow and set it with a thin layer of translucent powder.
2. Smudged Eyeliner
Smudged eyeliner takes away from that sharp cat eye look. Prevent smudging by picking a waterproof or long-lasting eyeliner. That way, it stays put all day.
Adding a matching eyeshadow over your eyeliner can help it stay even longer. Or try a smudge-proof eyeliner pencil for an easier application.
3. Fading Lipstick
Your lipstick shouldn’t fade minutes after you apply it. To keep it on longer, use a lip liner first. It stops your lipstick from moving around.
Blot and reapply your lipstick for better color. A little dusting of translucent powder over it sets the color and makes it last longer.
4. Melting Makeup in Hot Weather
Heat can make your makeup slide right off. Use an oil-free primer to start, for a better hold. This will also create a good base for your makeup.
Choose makeup that can handle the heat, like long-wear and waterproof products. A setting spray helps keep everything in place and feels refreshing too.
5. Cakey Foundation
Cakey foundation is never a good look. Begin with well-moisturized skin to avoid it. This step makes your foundation glide on more smoothly.
Use foundation that suits your skin type. Adding too much can make it look cakey. Always start with a little and blend well for a flawless finish.
By following these expert tips, you can beat common makeup challenges. Stay confident and creative with makeup. Enjoy the journey without worrying about these small obstacles!
Mastering Eye Makeup Techniques
The eyes are often called “the windows to the soul.” They’re also key in makeup, drawing attention in stunning ways. Whether aiming for a simple or striking look, mastering eye makeup is crucial. You’ll pick up professional tips for stunning eyeshadow, perfect eyeliner, and enhanced lashes. By using our advice, you can create eye looks that grab attention all day and all night.
Eyeshadow Application:
Applying eyeshadow boosts your eyes, giving depth and interest. Start with a neutral base and layer darker shades in the crease for a perfect blend. A fluffy brush creates a soft look, while a flat one gives intense color. Always remember to blend your shades well.
Eyeliner Precision:
Eyeliner defines your eyes, adding a bold touch. Getting a neat line is crucial. For a classic or modern look, draw a thin line, then gradually thicken it. When aiming for a wing, use your lower lash line as a guide. And don’t forget, practicing your liner skills will make you a pro!
Lash Enhancement:
Long, full lashes can make your eye look pop. Mascara is essential for this. Before you apply it, curl your lashes to open up your eyes. For more volume, wiggle the brush at your lash roots. Always clear the wand of extra mascara to prevent clumping. For more drama, consider false lashes or extensions.
Working on your eye makeup is all about trying new things. Experiment with different colors and methods to see what suits you best. Always remember, being confident in your makeup choices makes the biggest impact.
Achieving the Perfect Brows
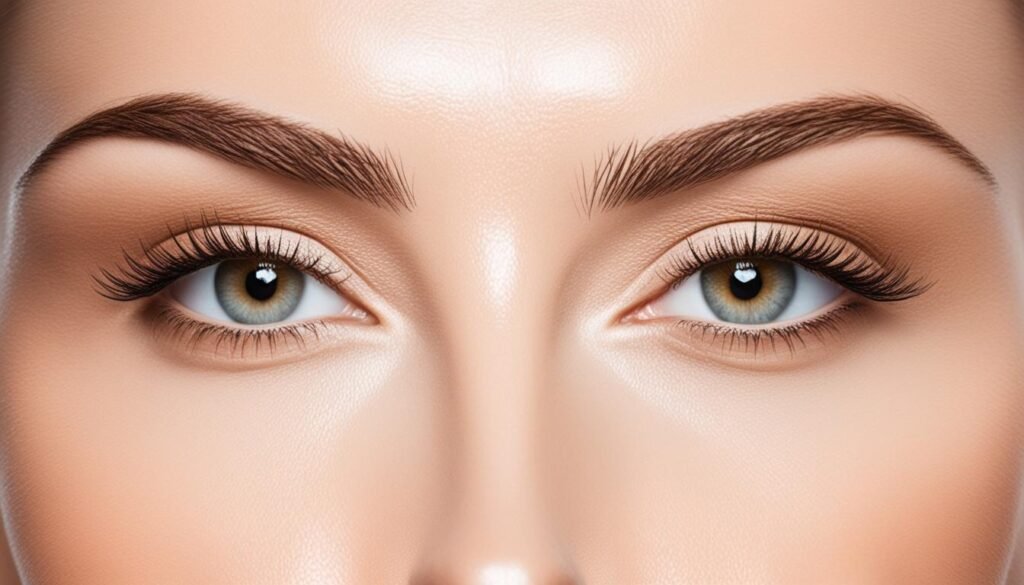
Having well-groomed brows helps frame your face beautifully. This takes your overall look to a higher level. With the right skills, you can get the perfect brows. They will make your natural beauty stand out. Let’s look into some expert advice on shaping, filling, and grooming your eyebrows.
Shaping Your Brows
“Your brows should follow your natural brow bone shape. Enhance your natural arch or create one that complements your face shape.” – Brow Expert, Michelle Park
Choosing the right shape for your brows starts with knowing your face shape. You also need to work with how your brows naturally grow. Follow these easy steps for shaping your brows:
- Cleanse your eyebrows to take off any leftover makeup or oils.
- Use a spoolie brush to brush your brows upwards. Trim long hairs that go beyond your natural brow line.
- First, find your arch. Use a pencil or brush to connect the outer nostril edge with your eye’s inner corner. Your arch’s highest point should match where this line touches your brow.
- Next, lightly outline your brow’s ideal shape with a pencil or powder.
- Pluck any hairs outside your outlined shape. Pull in the direction the hair grows to reduce pain.
Filling and Grooming Your Brows
After shaping, it’s time to fill and groom your brows. To get that perfect and defined look, follow these steps:
- Pick a brow product that fits your hair color and skin tone well. Options include brow pencils, powders, or gels.
- Begin by filling sparse areas with light, gentle strokes. Mimic the direction of your natural hair to look natural.
- Then, use a spoolie to blend everything. This will evenly spread the product and color.
- If necessary, apply some concealer or highlighter around your brows. This cleans up edges and makes them stand out more.
- Finally, use a clear or tinted brow gel to set everything in place. It helps your brows stay neat and last all day.
Use these expert tips to get the perfect brows that highlight your features. Remember, patience and practice are key. Try different techniques and products to see what suits you best. Don’t forget, perfect brows are achievable!
Brow Techniques at a Glance
| Technique | Description |
|---|---|
| Shaping | Defining your brows to enhance your natural look and face. |
| Filling | Adding color and shape to sparse parts for a thicker look. |
| Grooming | Combing, blending, and keeping brows in place for a polished finish. |
With these techniques, beautiful brows are within your reach. They will compliment your features and enhance your appearance.
Sculpting and Contouring
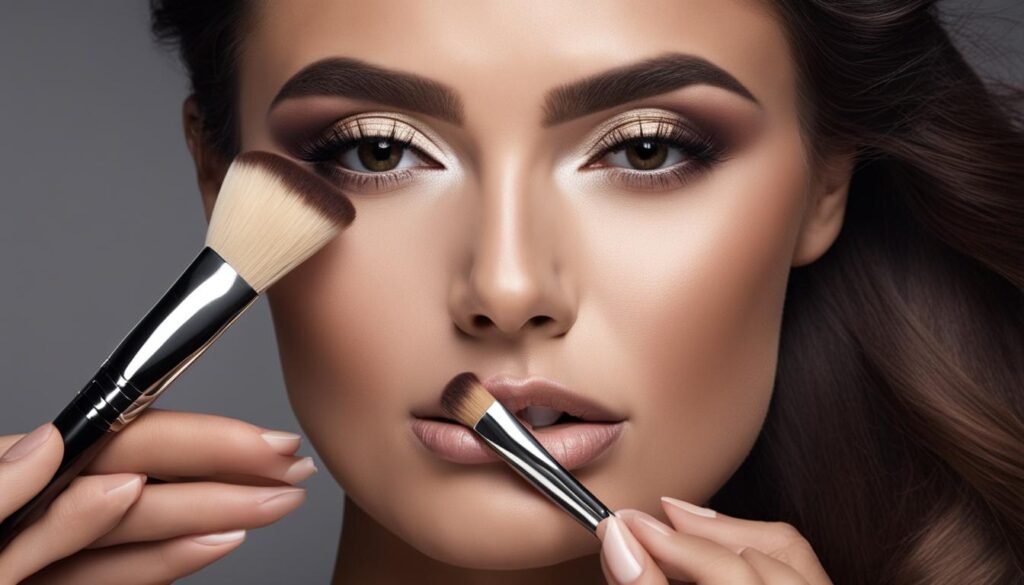
Contouring and sculpting your face can make a big difference. It helps add dimension and highlight your best features. A little bit of shadow and light in the right places can give you a look that stands out.
First, it’s important to know your face shape. Your face might be oval, round, square, heart, or diamond. The shape guides where to apply contour and highlight. It’s all about making the most of your unique features.
Using a matte bronzer or contour powder is a top pick for many. These products help create shadows. Put it under your cheekbones and on the sides of your nose. It helps to blend everything well.
Highlighting is also key. It means adding lighter shades to the places you want to stand out. Think the tops of your cheeks, nose bridge, and cupid’s bow. This step completes your contoured look.
One of the most critical parts is blending. Always blend carefully to avoid any harsh lines. A soft brush or damp sponge is great for this. This guarantees your makeup looks natural and flawless.
Pro Tips for Sculpting and Contouring:
- Pick a contour shade a bit darker than your skin for a natural effect.
- Go for a matte bronzer or powder with a cool undertone to mimic natural shadows.
- Blend lightly with a fluffy brush or sponge for a smooth finish.
- Cream contours are good for a strong, buildable look.
- Always blend your contour and highlight well for best results.
With time and some practice, you can perfect sculpting and contouring. These methods highlight your beauty in a unique way. Remember, makeup is all about creativity. So, don’t shy away from trying new things. Enjoy sculpting and contouring to enhance your makeup skills.
Enhancing Your Natural Glow: Highlighting and Blush
Highlighting and blush play key roles in making your natural beauty shine. They add a fresh, lively look to your makeup. Highlighting gives a gleaming youthfulness to your skin. Blush, on the other hand, brings a rosy, healthy warmth to your cheeks. Together, they create a look that’s both glowing and natural.
Choosing the right highlighter for your skin tone is vital for a flawless look. Go for a shade that matches your skin, whether you’re light, medium, or dark. Aim for a natural shine by picking a shade close to your skin’s undertone. This will make your highlights appear subtle yet striking.
Focus the highlighter on areas where light naturally hits, like the tops of your cheekbones and the bridge of your nose. Use a soft, fluffy brush for a light, even dusting. This application method helps avoid any streaky lines.
If you want a more intense shine, try applying your highlighter with a damp sponge or your fingers. This method helps the product blend into your skin, resulting in a radiant finish.
Now, let’s dig into blush. Picking the right blush color can make or break your look. Lighter skin tones look best with pink or peachy blushes. Deeper skin tones are flattered by berries and rich reds.
When applying blush, a soft smile can help you find the apples of your cheeks. Lightly apply and blend it towards your temples. Go easy with the amount at first, adding more as needed for that perfect flush.
Blush can also double as eyeshadow for a unified look by lightly sweeping it across your eyelids. This adds to the natural, healthy glow.
Highlighting and blush are tools to emphasize your unique beauty. Don’t be afraid to try new shades and techniques. Let your individuality shine through with the right choices.
Expert Tips for Highlighting and Blush
- Choose a highlighter shade that complements your skin tone
- Apply highlighter to the high points of your face for a natural glow
- Use a fluffy brush for a seamless highlight application
- Apply blush to the apples of your cheeks and blend upwards
- Blend blush onto your eyelids for a monochromatic look
Mastering Lipstick Application
No makeup look is complete without the perfect lip color. Your lipstick can tie your entire look together. Work on how you apply your lipstick. Use lip liner for precision. Choose long-lasting formulas.
Applying Lipstick Flawlessly
First, make your lips smooth and ready for lipstick. Use a lip scrub to get rid of dry skin. Then, hydrate your lips with a lip balm.
You can apply lipstick straight from the bullet or with a brush. Start from the middle of your lips. Perfectly follow the shape of your lips. Add extra layers for a bold look.
Blot your lips with a tissue to stop smudging. Lightly apply translucent powder. This sets your lipstick and makes it last longer without smudging.
Using Lip Liner for Precision
Lip liner helps your lipstick stay neat and prevents color bleeding. Start by outlining your lips with a liner that matches your lipstick.
Outline your cupid’s bow and follow your lip’s natural shape. For plumper lips, you can line slightly outside your lips. Then, fill in your lips. This creates a good base for your lipstick to stay longer.
Ensuring Long-Lasting Color
Long-lasting lipstick is important. Look for lipsticks that are “long-wearing” or “transfer-proof.” These stay on and keep their color for hours.
Lip primers help your lipstick stay longer. They make your lips a better surface for the color.
Avoid lots of lip touching to keep your color from smudging. If needed, do a small touch-up during the day to keep your color vibrant.
| Lipstick Tips: | Long-Lasting Lipstick Brands: |
|---|---|
| 1. Prep your lips with lip scrub and lip balm. | 1. Maybelline SuperStay Matte Ink |
| 2. Use a lip brush or apply lipstick directly to the lips. | 2. MAC Retro Matte Lipstick |
| 3. Blot and set with translucent powder. | 3. Fenty Beauty Stunna Lip Paint |
| 4. Outline and fill in with lip liner. | 4. NARS Powermatte Lip Pigment |
| 5. Choose long-lasting lipstick formulas labeled as “transfer-proof” or “smudge-proof.” | 5. Pat McGrath Labs MatteTrance Lipstick |
By perfecting how you apply lipstick and choosing the right products, your lip look can be amazing. Play with different colors and finishes. It can really boost your makeup and let your style shine.
Setting and Extending Your Makeup’s Longevity
Putting on makeup can take a lot of time. That’s why it’s key to make sure it stays nice all day. To keep your look lasting, it’s important to learn how to set your makeup. Here, we’ll talk about some good techniques for setting your makeup. And, we’ll share tips on how to keep your makeup looking fresh from morning to night.
The Importance of Makeup Setting
Makeup setting is vital for keeping your face looking great all day. It locks your makeup in place, stopping it from smudging, fading, or going into fine lines. By setting your makeup, you create a shield. This shield helps your makeup survive the heat, sweat, and whatever your day throws at you.
“Makeup setting is like the final touch of an artist’s masterpiece. It keeps your creation intact and enables it to withstand the test of time.”
Techniques for Makeup Setting
There are lots of good ways to set makeup, depending on what you like and your skin type. A favorite is using a makeup setting spray. This spray leaves a fine, even layer over your makeup. Just spray it on from about eight inches away and let it dry.
Another method is to use a big, fluffy brush. Dip it in translucent powder, tap off the extra, and gently brush it all over your face. This removes oil and helps your foundation stay put. Be sure to choose a powder that matches your skin so your look stays natural.
Tips for Touch-ups
During the day, your makeup might fade or need a little fixing. It’s smart to keep a small kit with you. Fill it with things like a mirror, blotting papers, a tiny powder, and a lipstick or gloss to touch up your lips.
To do a quick touch-up, start by using blotting papers. Press them on your skin to remove oil. Then, lightly apply powder to your shiny spots for a fresh look.
Extending Your Makeup’s Longevity
If you want your makeup to last from day to night, try these simple tricks:
- Use a foundation that’s made to last or is waterproof.
- Put on an eyeshadow primer before adding your eyeshadow for longer wear.
- Choose lip products that stay put, like liquid lipsticks.
- Top it all off with setting spray to keep everything in place.
By using these methods and tips, your makeup can last a long time. You’ll be able to do touch-ups easily and keep looking fresh around the clock.
| Makeup Setting Techniques | Pros | Cons |
|---|---|---|
| Makeup Setting Spray | – Provides a natural finish – Quick and easy to use – Suitable for all skin types |
– Some sprays may contain alcohol, which can be drying – May not hold up well in extremely humid conditions |
| Translucent Powder | – Absorbs excess oil – Sets foundation in place – Provides a matte finish |
– Can be messy to apply – May appear heavy or cakey if applied too heavily – Not suitable for dry skin |
Conclusion
Congratulations on finishing this in-depth guide to makeup! We’ve given you expert advice and tips for perfect makeup and how to make it last longer.
Know your skin type and use a skincare routine. Learn different makeup skills to improve your beauty routine. Don’t forget, the more you practice, the better you get.
Whether you love makeup or just want to look better, this guide helps you. The tips and skills you learned will let you make a lasting perfect look.
Your journey to makeup mastery starts now. Enjoy showing off your creativity through makeup. Use the best products and techniques to get beautiful results every time you start.
Can you be more specific about the content of your article? After reading it, I still have some doubts. Hope you can help me. https://accounts.binance.com/ka-GE/register?ref=RQUR4BEO